How To Edit Animation Sequences (Additive Layer Tracks) In UE4 | Tech Discussion
With Mythicism as my first project in UE4, I was used to how animation assets in Unity allow you to see and edit the keyframes. This had proved extremely useful in times where I had animations that were almost perfect but needed slight adjustments. In Unity it was quite easy to edit the keyframes without needing to consult an artist. For the longest time, however, I was unaware of any way to accomplish this in UE4. That is, however, until I discovered Additive Layer Tracks. Having now learned how to use them I will quickly demonstrate you can use them too.
Let’s take this animation sequence that we acquired from Mixamo as an example:
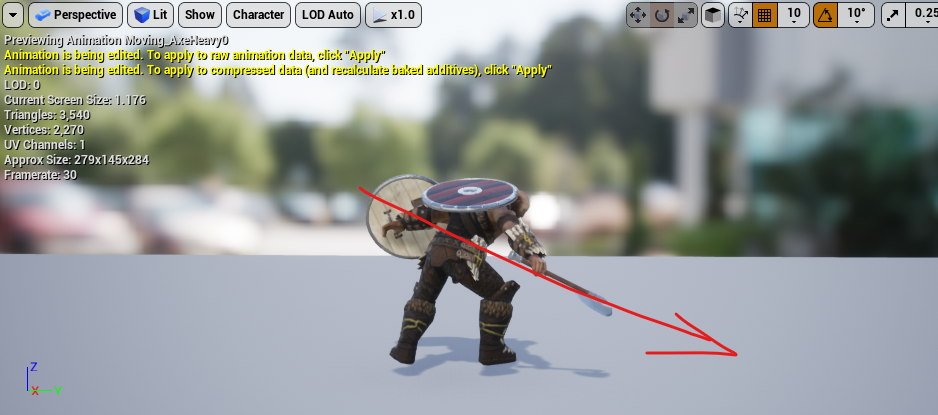
Now this animation is great, but currently the attack angle comes downward, almost at the feet of an opponent:
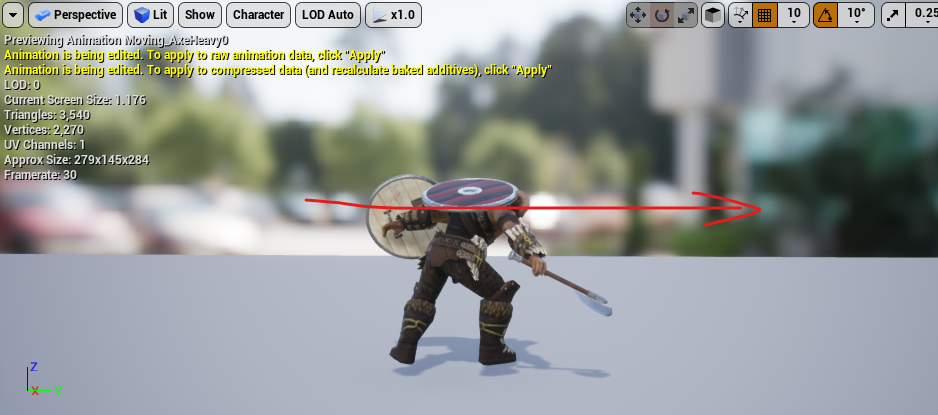
I would prefer for the angle of the attack to be more level instead, like this:
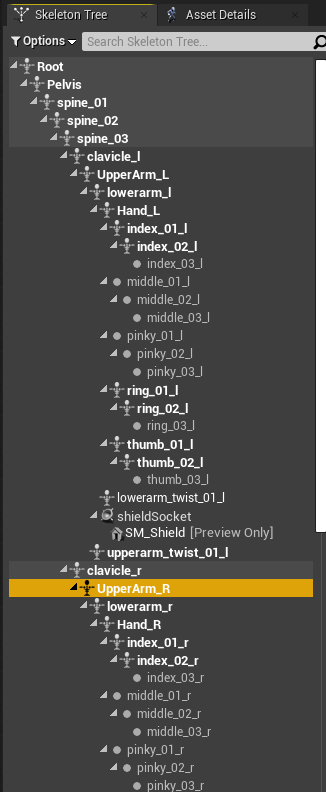
Well with additive layer tracks this is a simple fix. Firstly you need to navigate to the Skeleton Tree tab and select the bone you wish to modify (UpperArm_R in this case)
After selecting the bone, you can animate additive layers for it by adjusting the transform, pressing the + Key button, and then applying the changes with the Apply button. A good approach for making a small adjustment to a part of an animation like we are doing here is to add empty keyframs before and after the part of the timeline you wish to modify, and then add your additive keyframes in the middle.
Here is a video demostrating this process: selecting the UpperArm_R bone, adding blank keyframes before and after the part of the timeline I want to modify, and then adding a modified keyframe between them:
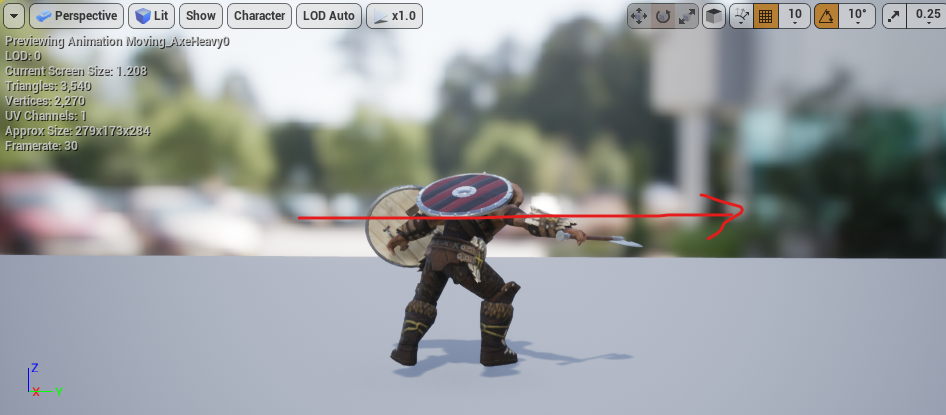
Just like the attack angle has been changed!
You can see how this simple technique can be leveraged to incredible lengths. Hopefully you find this helpful!
Author: Reilly da Silva
Leave a comment
Log in with itch.io to leave a comment.